How to Make a Summary Block Auto-Scroll in Squarespace
Wanna take your website's visual presentation up a notch?
If you want to add a touch of dynamism to your summary blocks, you're in the right place.
In this blog post, I’ll show you how to make a summary block auto-scroll effortlessly. By implementing this feature, you'll create a captivating experience for your visitors, guiding them through your content in a visually pleasing way.
So grab a cup of coffee and get ready to learn how to make your summary block come alive with seamless scrolling in Squarespace 7.1. Let's dive in and elevate your website's appeal together!
What is a Summary Block?
You can find a detailed description in Squarespace’s Help Pages, but essentially a Squarespace summary block is a feature that displays a condensed overview of content items, such as blog posts or products, in a visually organized manner on a Squarespace website.
It pulls content from one page and displays it on another. It can be used for blog posts, events, store pages, and videos pages.
Step 1: Add a Summary Block
Go to the page where you’d like to display the summary block and select +Add Block > Summary.
Step 2: Edit the Summary Block Design Settings
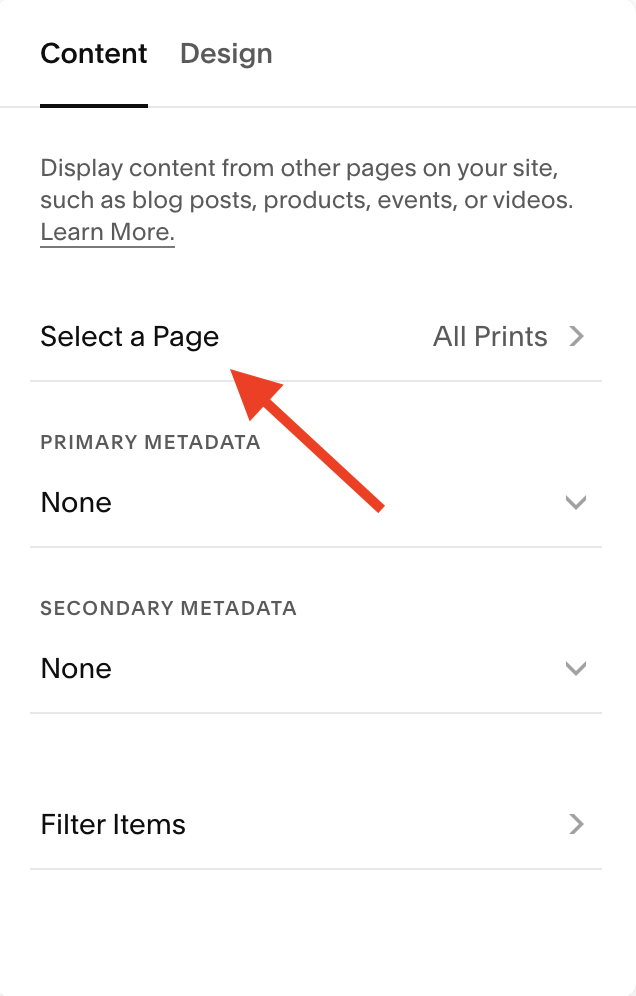
Choose the page you want to pull the content from. In my video, I selected the ‘Shop.’
Decide how many items you want to be displayed.
Select or de-select the elements you want to be displayed in your summary block. In my video tutorial, I only want the image displayed, so I de-selected the Title, Excerpt, and Price.
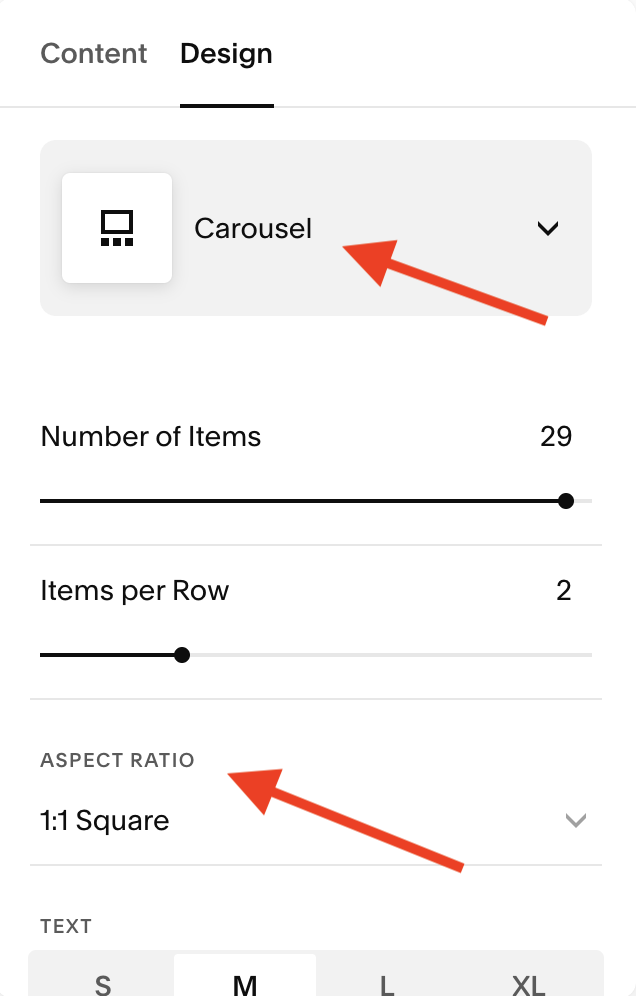
Select the ‘Carousel’ option.
Decide how many items per row you want to be displayed. In my video, I chose 1 because I like the way it looks!
Adjust the aspect ratio to your liking and resize the block.
Change the header text to read how you want it to or just delete it.

Step 3: Add the Code Snippet
Head on over to the page settings and select ‘Advanced’ and add this code:
<!-- Summary Block Auto-Scroll -->
<script>
window.onload = function() {
var nextArrow = document.querySelector(".summary-carousel-pager-next");
function clickNext() {
nextArrow.click();
}
setInterval(clickNext, 3000);
};
</script>
Step 4: Adjust the Speed
Feel free to play around with the speed until you get it the way you like it.
The number you’ll want to change is the ‘3000’ in the code above. This number represents milliseconds.
Just play with it…it’s fun!
Careful with Scrolling Content
When it comes to scrolling content, it's essential to exercise caution and consider its purpose carefully.
While scrolling can add a dynamic and visually engaging element to a website, it's generally advisable to keep scrolling content purely visual and avoid making it clickable.
Clickable scrolling content can lead to user frustration as it disrupts the expected browsing behavior and may unintentionally hinder the user experience.
By reserving scrolling content solely for visual purposes, you can ensure a seamless and intuitive browsing experience for visitors, allowing them to focus on the engaging visual presentation without the added frustration of unexpected clickable elements.
Are you going to try this on your website? A client’s website? What will you use it for? Share in the comments 👇
This page contains affiliate links