A Step-by-Step Guide to Creating an Idea Pin in Pinterest
Pinterest has evolved into a powerful platform for businesses to showcase their products, services, and ideas to a vast and engaged audience.
With the introduction of Idea Pins, previously known as Story Pins, businesses now have an even more immersive and interactive way to captivate their audience.
In this step-by-step guide, I’ll walk you through the process of creating an Idea Pin with your Pinterest business account, helping you engage and inspire your followers like never before.
Watch Me Do It ⬆or Read About It ⬇...or Both!
Step 1: Access Your Business Account
To get started, log in to your Pinterest business account. If you don't have one, you can easily convert your personal account or create a new business account specifically for your brand. Having a business account provides access to valuable analytics and promotional features to maximize your reach and impact.
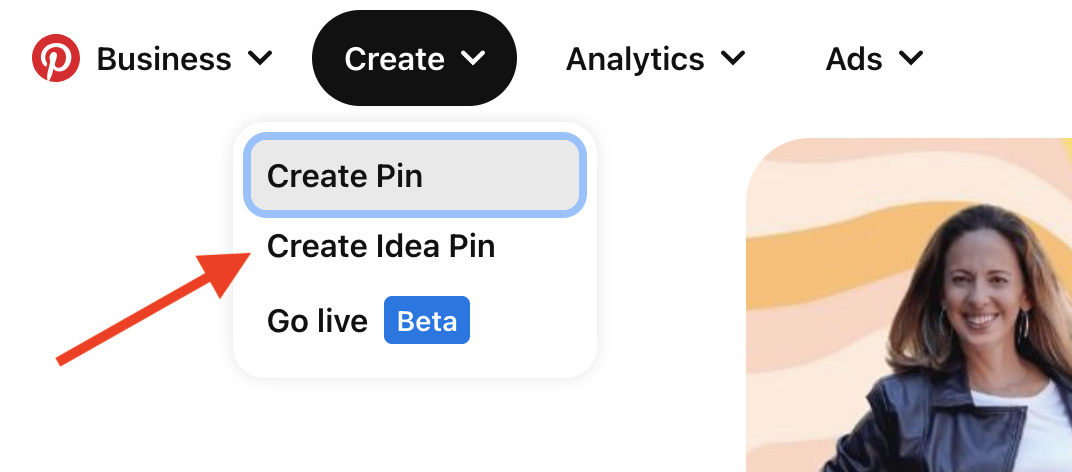
Step 2: Navigate to the Idea Pin Creator
Once you're logged in, go to your profile page and select ‘Create Pin.’ From the drop-down menu, select 'Create Idea Pin' to launch the Idea Pin creator.
Step 3: Select Your Cover Image
The cover image is the first impression your Idea Pin makes, so choose a visually striking image that represents your pin's theme and captures attention.
Upload a high-quality image that aligns with your brand identity and evokes curiosity.
Step 4: Craft a Captivating Title and Description
Next, it's time to create a captivating title and description for your Idea Pin. Your title should be concise, attention-grabbing, and effectively convey the main idea behind your pin.
In the description, provide additional context, include relevant keywords, and consider incorporating hashtags to improve discoverability. Remember to align your title and description with your brand voice and messaging.
Step 5: Enrich Your Pin with Multimedia Elements
One of the most exciting aspects of Idea Pins is the ability to incorporate a variety of multimedia elements.
Click on the pencil icon to include images, videos, or a combination of both.
Experiment with a mix of compelling images, short videos, and text overlays to create an engaging and informative pin.
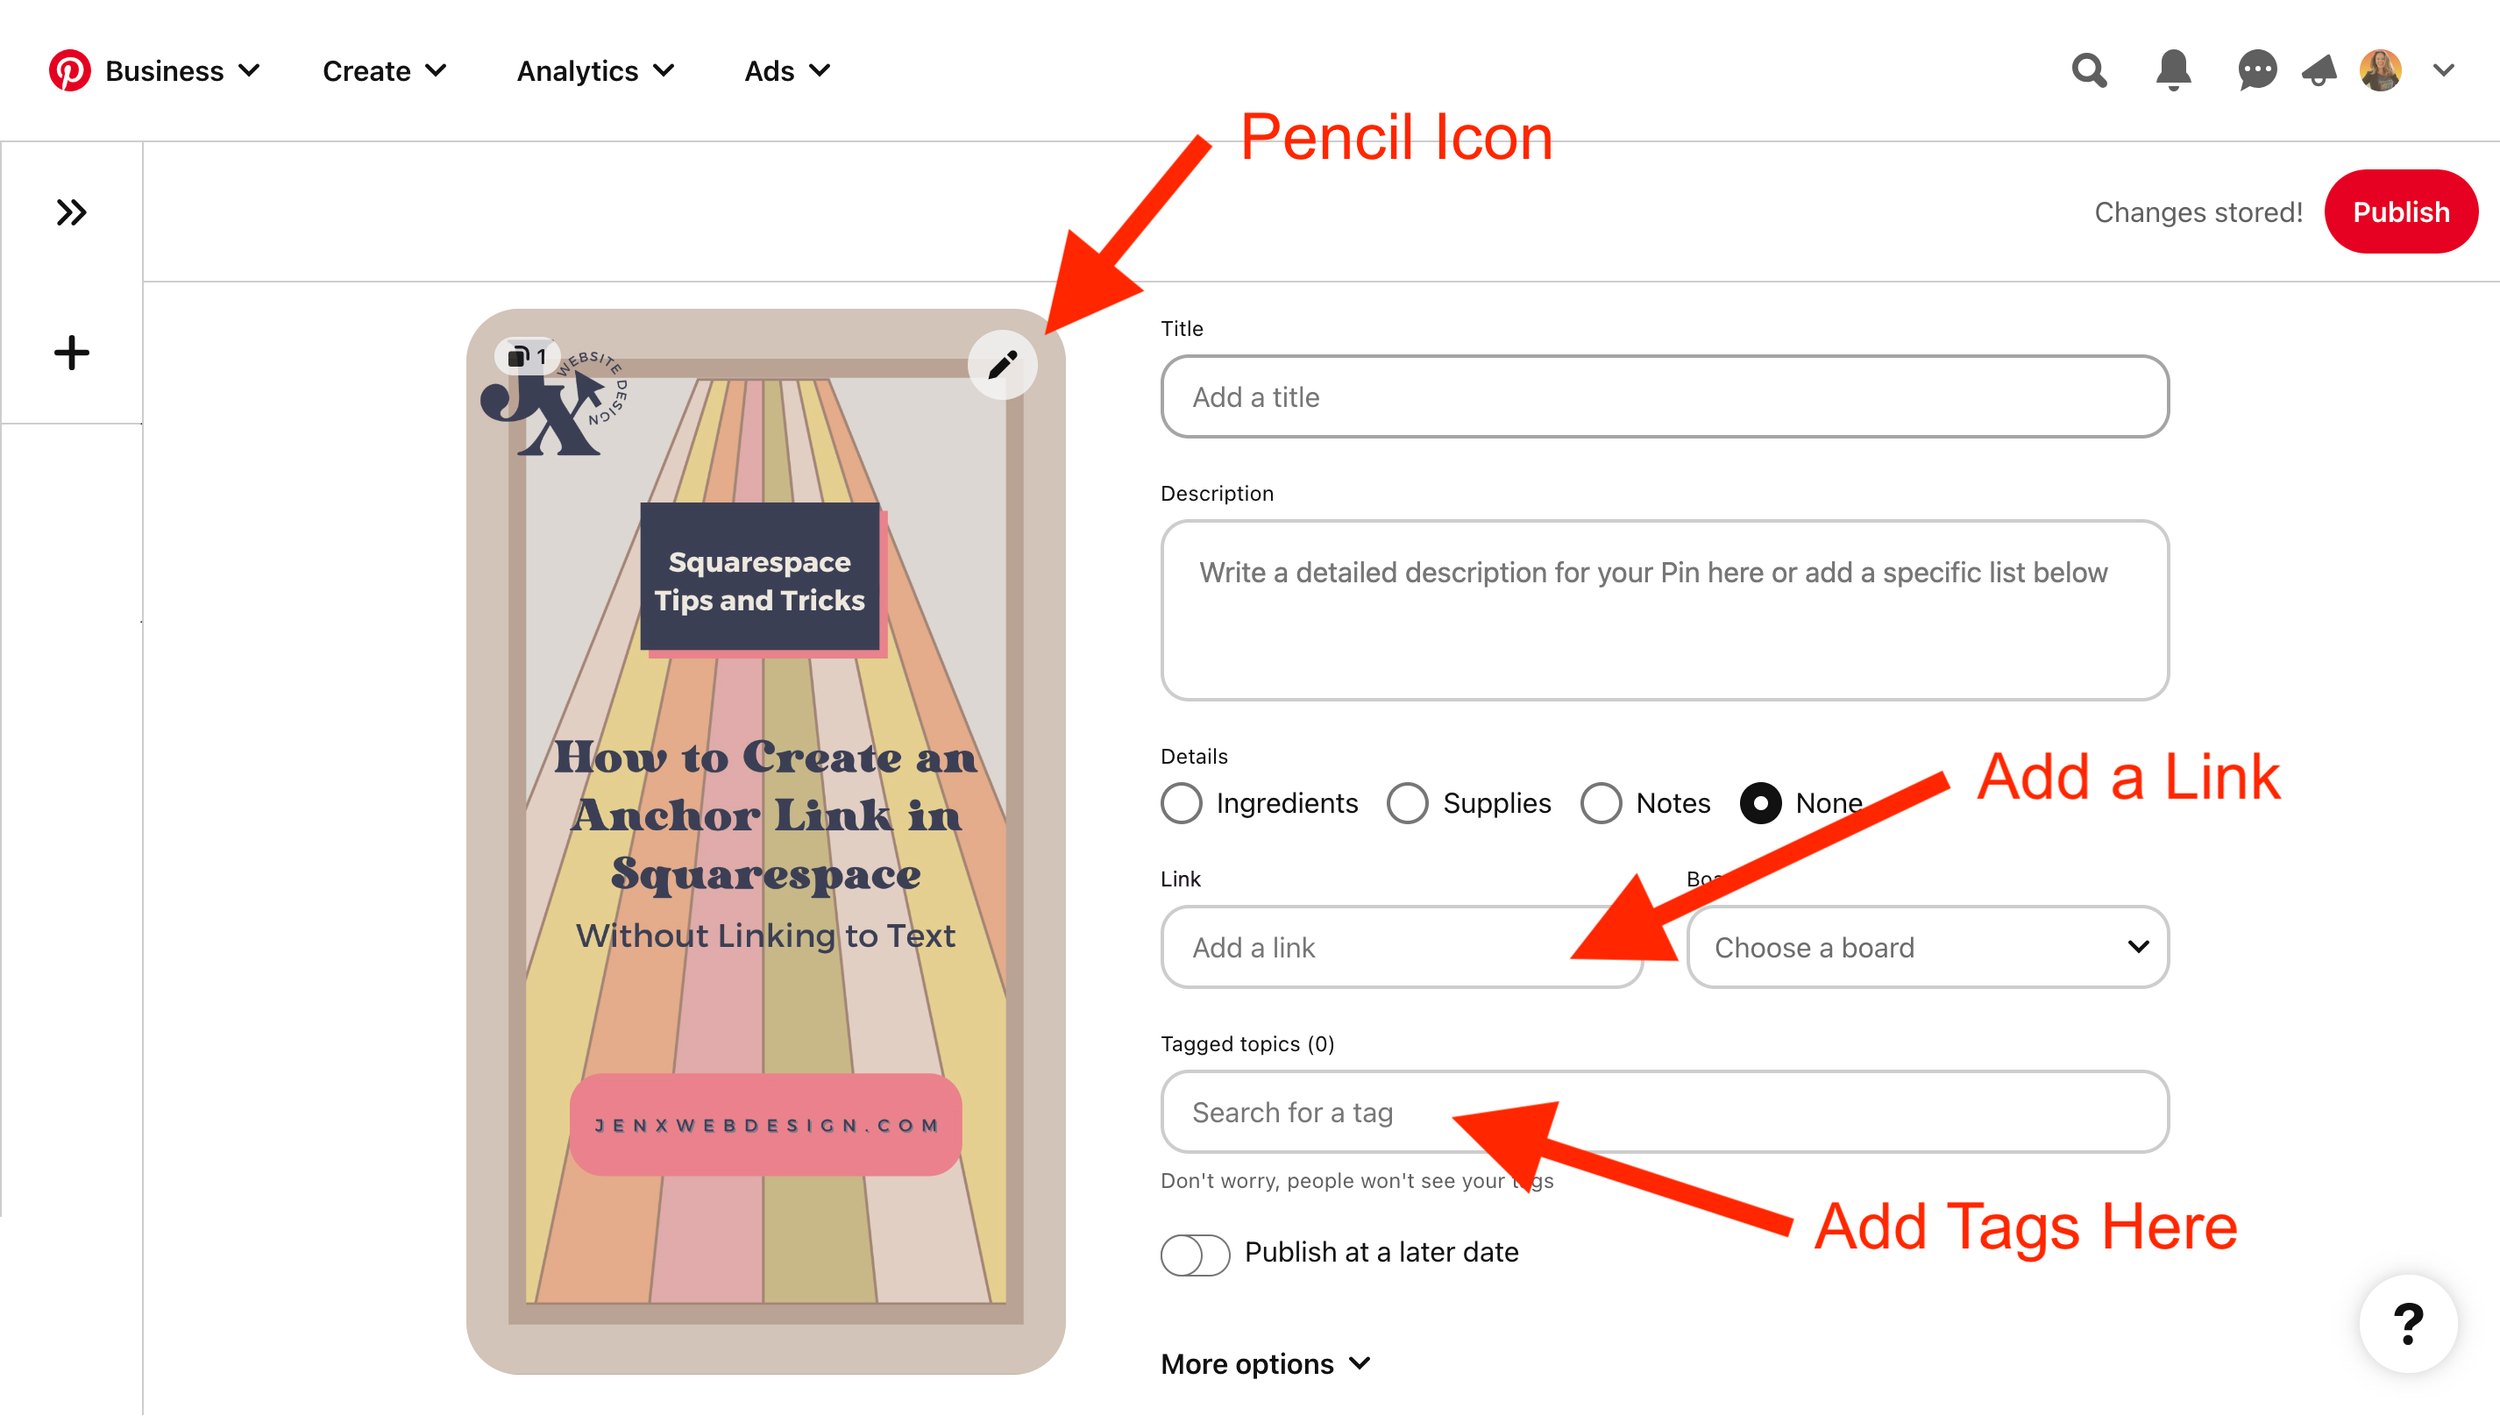
Step 6: Add a Link
Make your Idea Pin actionable by adding a link. Click on the 'Add a link' button and enter the URL that you want to associate with your Pin.
Step 7: Add Relevant Tags
Optimize the discoverability of your Idea Pin by adding relevant tags. Tags are keywords or phrases that describe the content of your pin.
Click on the 'Add tags' field and include keywords that are relevant to your pin's theme, industry, or target audience. Use specific and descriptive tags to increase the chances of your pin appearing in relevant search results.
Step 8: Publish and Promote
Once you're satisfied with your Idea Pin, click the 'Publish' button. Take a moment to review how your pin appears to viewers before sharing it.
This page contains affiliate links