

How to Create a Sidebar in Squarespace Using a Summary Block
Sidebars (like the one to the right →) are a common feature found on many websites that provide a space to display additional content and functionality over several pages and are often incorporated into blog posts.
They typically appear vertically on the side of a webpage or blog to provide extra information to users. They strategically contain links the website developer wants to draw attention to in order to guide visitors to take the steps they most want them to take.
Some great links to include in a sidebar would lead the visitor to:
Select your strong call-to-action (like ‘buy now,’ ‘schedule a call,’ or ‘shop now’)
Get your free opt-in(s) (it’s great if you have more than 1)
Shop your most popular item(s)
Add highly convertible affiliate links
Check out your services
Sidebars enhance the user experience by keeping the clutter out of the navigation menu and drawing attention to more valuable content that will benefit both your visitor and you.
Squarespace doesn’t have a built-in sidebar feature, but you can use a summary block to create your own.
Why Use a Summary Block?
The benefit of using a summary block rather than just building a sidebar using Squarespace blocks is that you can easily make updates to the collection from which the sidebar is populating thus editing every single page where the sidebar appears at once rather than having to go into each individual post to make your desired changes, saving you tons and tons of time.
In this tutorial, I create a sidebar using Canva (you can certainly use Illustrator), a Squarespace blog collection, and a summary block.
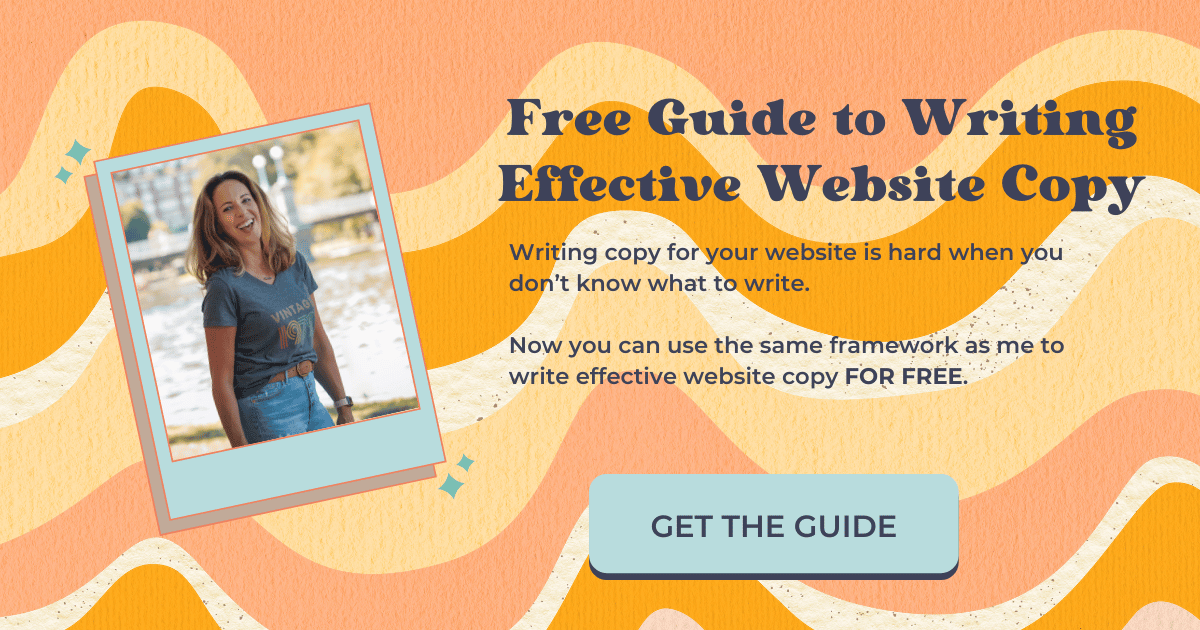
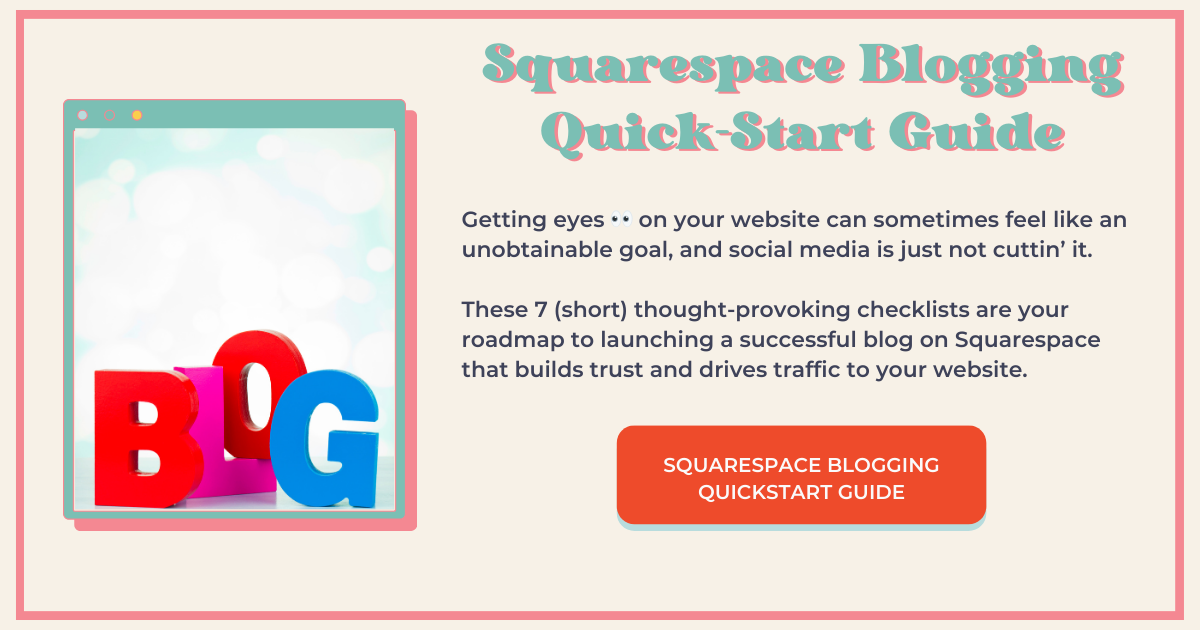
Two Sidebar variations. (Two bonus variations in the YouTube tutorial above)

Sidebar variation 1

Sidebar variation 2.
Create Graphics in Canva
Creating Buttons for Your Sidebar in Canva
Size DOES matter. I played around with this a little and determined that buttons work best with a canvas size of 300 px x 110 px. I added an adjustable shape block and nearly filled the canvas, but not quite.
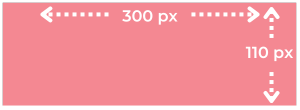
Size of Canva Button Graphic
You can also play with some of Canva’s cool graphics. If you have a Canva Pro subscription you will have more options here. Some elements you can search are:
Paint Stroke
Swish
Ribbon
Rectangle
Button
Or you could add a gradient by selecting ‘gradient’ from the color menu in Canva.

Selecting ‘gradient’ from the color menu in Canva
Creating Graphics for Your Sidebar in Canva
Now you can customize and create graphics to accompany your buttons. Mine are 300 px x 300 px.

Size of Canva graphic
Design these however you like, but remember that it’s the message that matters. Entice visitors to click on your free things by telling them what they’ll get and how it will solve their problem.
Create Your Profile Pic for Your Sidebar in Canva
When you create your profile pic, you can choose from one of the many frames in Canva. You will get more options with the Pro plan, but the free plan works fine too.
Use the same size canvas for your profile pic (300 px x 300 px)
Type ‘frame’ into the search field and select ‘see all.’ Choose your desired frame and add it to your canvas.
Now upload your profile pic into Canva, click and drag it into the frame.
Download your graphics as PNG files with a transparent background.
*If you chose a background color for your graphics rather than an element, download these graphics without a transparent background.

Type ‘frame’ in the search field and select ‘see all’

Choose a frame and add it to your canvas

Upload your photo into Canva, then click and drag it into the frame

Download Canva graphics with a transparent background

Create the Sidebar in Squarespace
Create a New Blog Collection
Go to the not-linked section of your website and add a blog collection. It doesn’t matter which layout you choose because no one will see it. Name it ‘sidebar’ so you don’t confuse it with your real blog. Hide it from SEO search results, but don’t disable it.
Go to the blog and delete all the example blog posts.

Go to the ‘Not Linked’ section and add a blog

Choose any layout, it doesn’t matter because no one will see it

Name your blog ‘sidebar’ and delete example posts
Upload Graphics
When a sidebar pulls in content from a collection page (like a blog), it displays the thumbnail, or ‘featured’ image. With that in mind, upload the graphics you just created as thumbnail images to new blog posts, because these are what we want to display in our sidebar.
We also know that blog posts appear in chronological order starting with the most recent and working backward. Therefore, we want to upload our graphics starting with the graphic we want to appear at the bottom of the sidebar.
Select the plus sign and add a post. Go to settings and upload your graphic. If your graphic is a button, you’ll scroll down to “Source URL” and type in the link to the page you want the button to link to. Toggle “Link Post Title to Source URL” on.
Once you’ve uploaded your graphic and linked the source URL, go to the options tab and choose “publish.”

Upload your graphic

Go to the Options tab and choose ‘Publish’
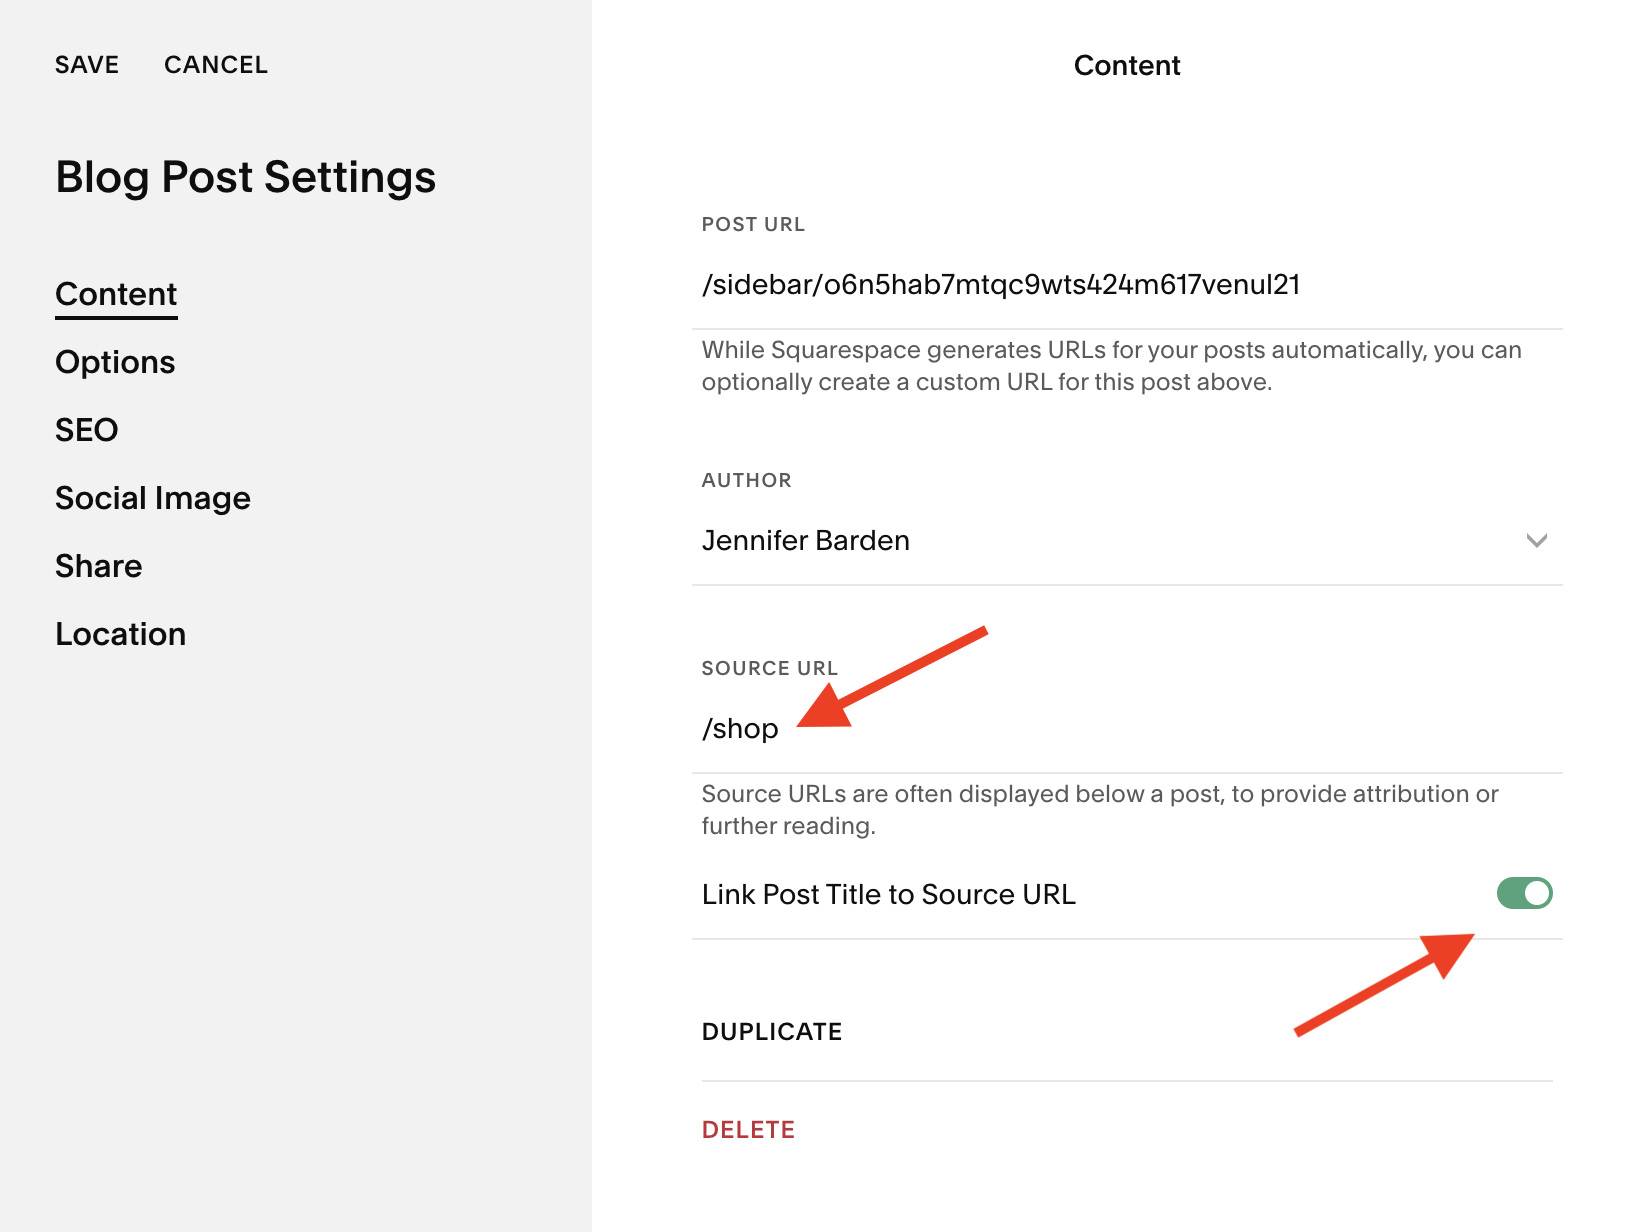
Add your link

Add your bio to the “Excerpt” section
Continue to add your graphics in this fashion, adding them in the correct order you want them to appear in your sidebar. You may or may not want to link the non-button graphics to a source URL, that’s totally up to you.
You’ll want to add some text to appear below your profile pic, and you might also want to do this for your graphics. If you like this idea or just want to try it out, go ahead and add some text to the “excerpt” section for these too. You can always delete them if you don’t like it.
You will not be adding any content to the pretend blog post itself so your work here is done!
Adding the Sidebar to Your Blog
Create some space for your sidebar by positioning a spacer down the entire right-hand column of your blog and adjusting it to allow space for the sidebar.
Add a summary block and choose the sidebar blog collection. For Primary and secondary metadata select “none.”

Add a summary block and select ‘sidebar’

In the content tab, choose ‘none’ for primary and secondary metadata
Click on the design tab and select the wall option. Choose the correct # of items you want displayed. This is going to be the number of thumbnail images you just uploaded.
Decide how you want your text aligned and deselect “title.” Make sure “excerpt” is on so your bio will appear below your image and any descriptions you added for your graphics will show up below the graphics.
Select “Size and spacing” and max out column width.
Tighten up the space between items by dragging the gutter width down.

Select ‘Wall,’ choose the correct # of thumbnails, and decide how to align your text

Adjust size and spacing of your summary block

Deselect ‘title’ and be sure ‘excerpt’ is toggled on
If you want to add more space between the sidebar and the blog content, add another spacer between the first spacer you added and the blog post content until you get it just how you like it.

Add spacers and adjust
Click “save” and admire your handiwork!
Enjoy the Convenience
If you already have a bunch of blog posts, you’ll have to add the sidebar to each of them.
Going forward, you can use an existing blog post as a template whenever you create a new one and your sidebar will already be in place.
When you want to update your sidebar, all you have to do is edit the fake sidebar blog.
You can also add items to your sidebar, just be sure to check when the surrounding “posts” were published and schedule yours on a date and time that will place your content in the order you’d like it to appear.
Will you try this?
Are you going to try this? What will you put in your sidebar? Do you already have a sidebar? Drop any comments or suggestions below! 👇
If you liked this post, you’ll LOVE these:
Customize Your Squarespace Blog Page Layout With Summary Blocks
The Best Way to Share YouTube Videos in Your Squarespace Blog Posts
Important Step to Getting Google to Index Your Squarespace Blog Posts
How and Why to Remove the Site Title from Your Squarespace Blog Posts
How to Add a Google Review Widget to Your Squarespace Website With Elfsight
This page contains affiliate links


My Insta
@jenxwebdesign


Like this post?
