
How to Add a Border to an Image Block in Squarespace
At the time I write this blog post, there’s not a way to add a border to an image block using native functions in Squarespace.
In this tutorial, I'm going to show you how to add a border to an image block in Squarespace using a bit of CSS.
Before I show you how to do this cool design-y thing, remember that it's your website's job to attract and engage your target audience, and to learn more about how to do that, check out my blog posts where I share lots of tips and strategies for attracting and engaging your target audience to your Squarespace website.
How to Add a Border to an Image Block in Squarespace
Adding a border to an image block in Squarespace is super easy. Watch me do it in the video above or follow the easy step-by-step tutorial here.
Here’s how you do it:
Head on over to pages, scroll all the way down to website tools and select ‘Custom CSS’
Then copy and paste the code below this video right here (scroll down for the code)
For this next step, you're going to need the Squarespace ID finder Chrome extension
Once you have that installed, select it, and then find the block ID associated with the image that you want to add the border to
Select the block ID and you'll see how it automatically copies to the clipboard
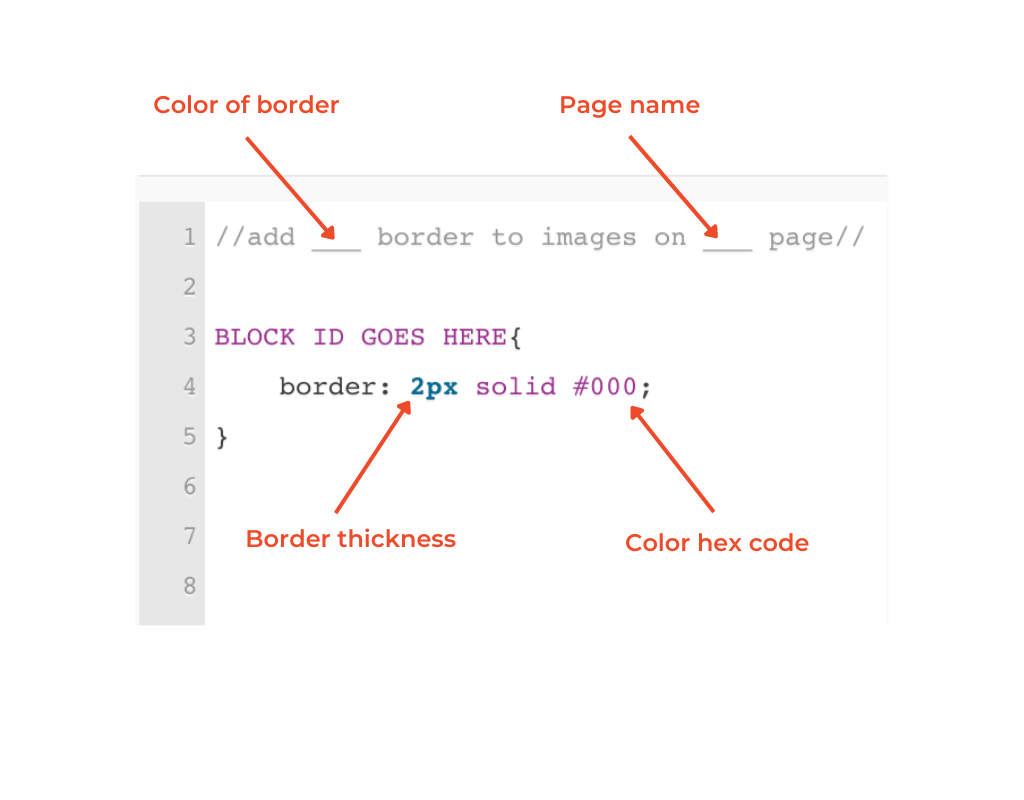
Now go back to your code and highlight where it says BLOCK ID GOES HERE and paste the code you just copied
Change the thickness of the border to whatever you want it to be
Change the color of the border to whatever you want it to be by changing the hex code

Heres the Code Snippet
//add ___ border to images on ___ page//

BLOCK ID GOES HERE{
	border: 2px solid #000;
}
Where to Put Things in the Code Snippet
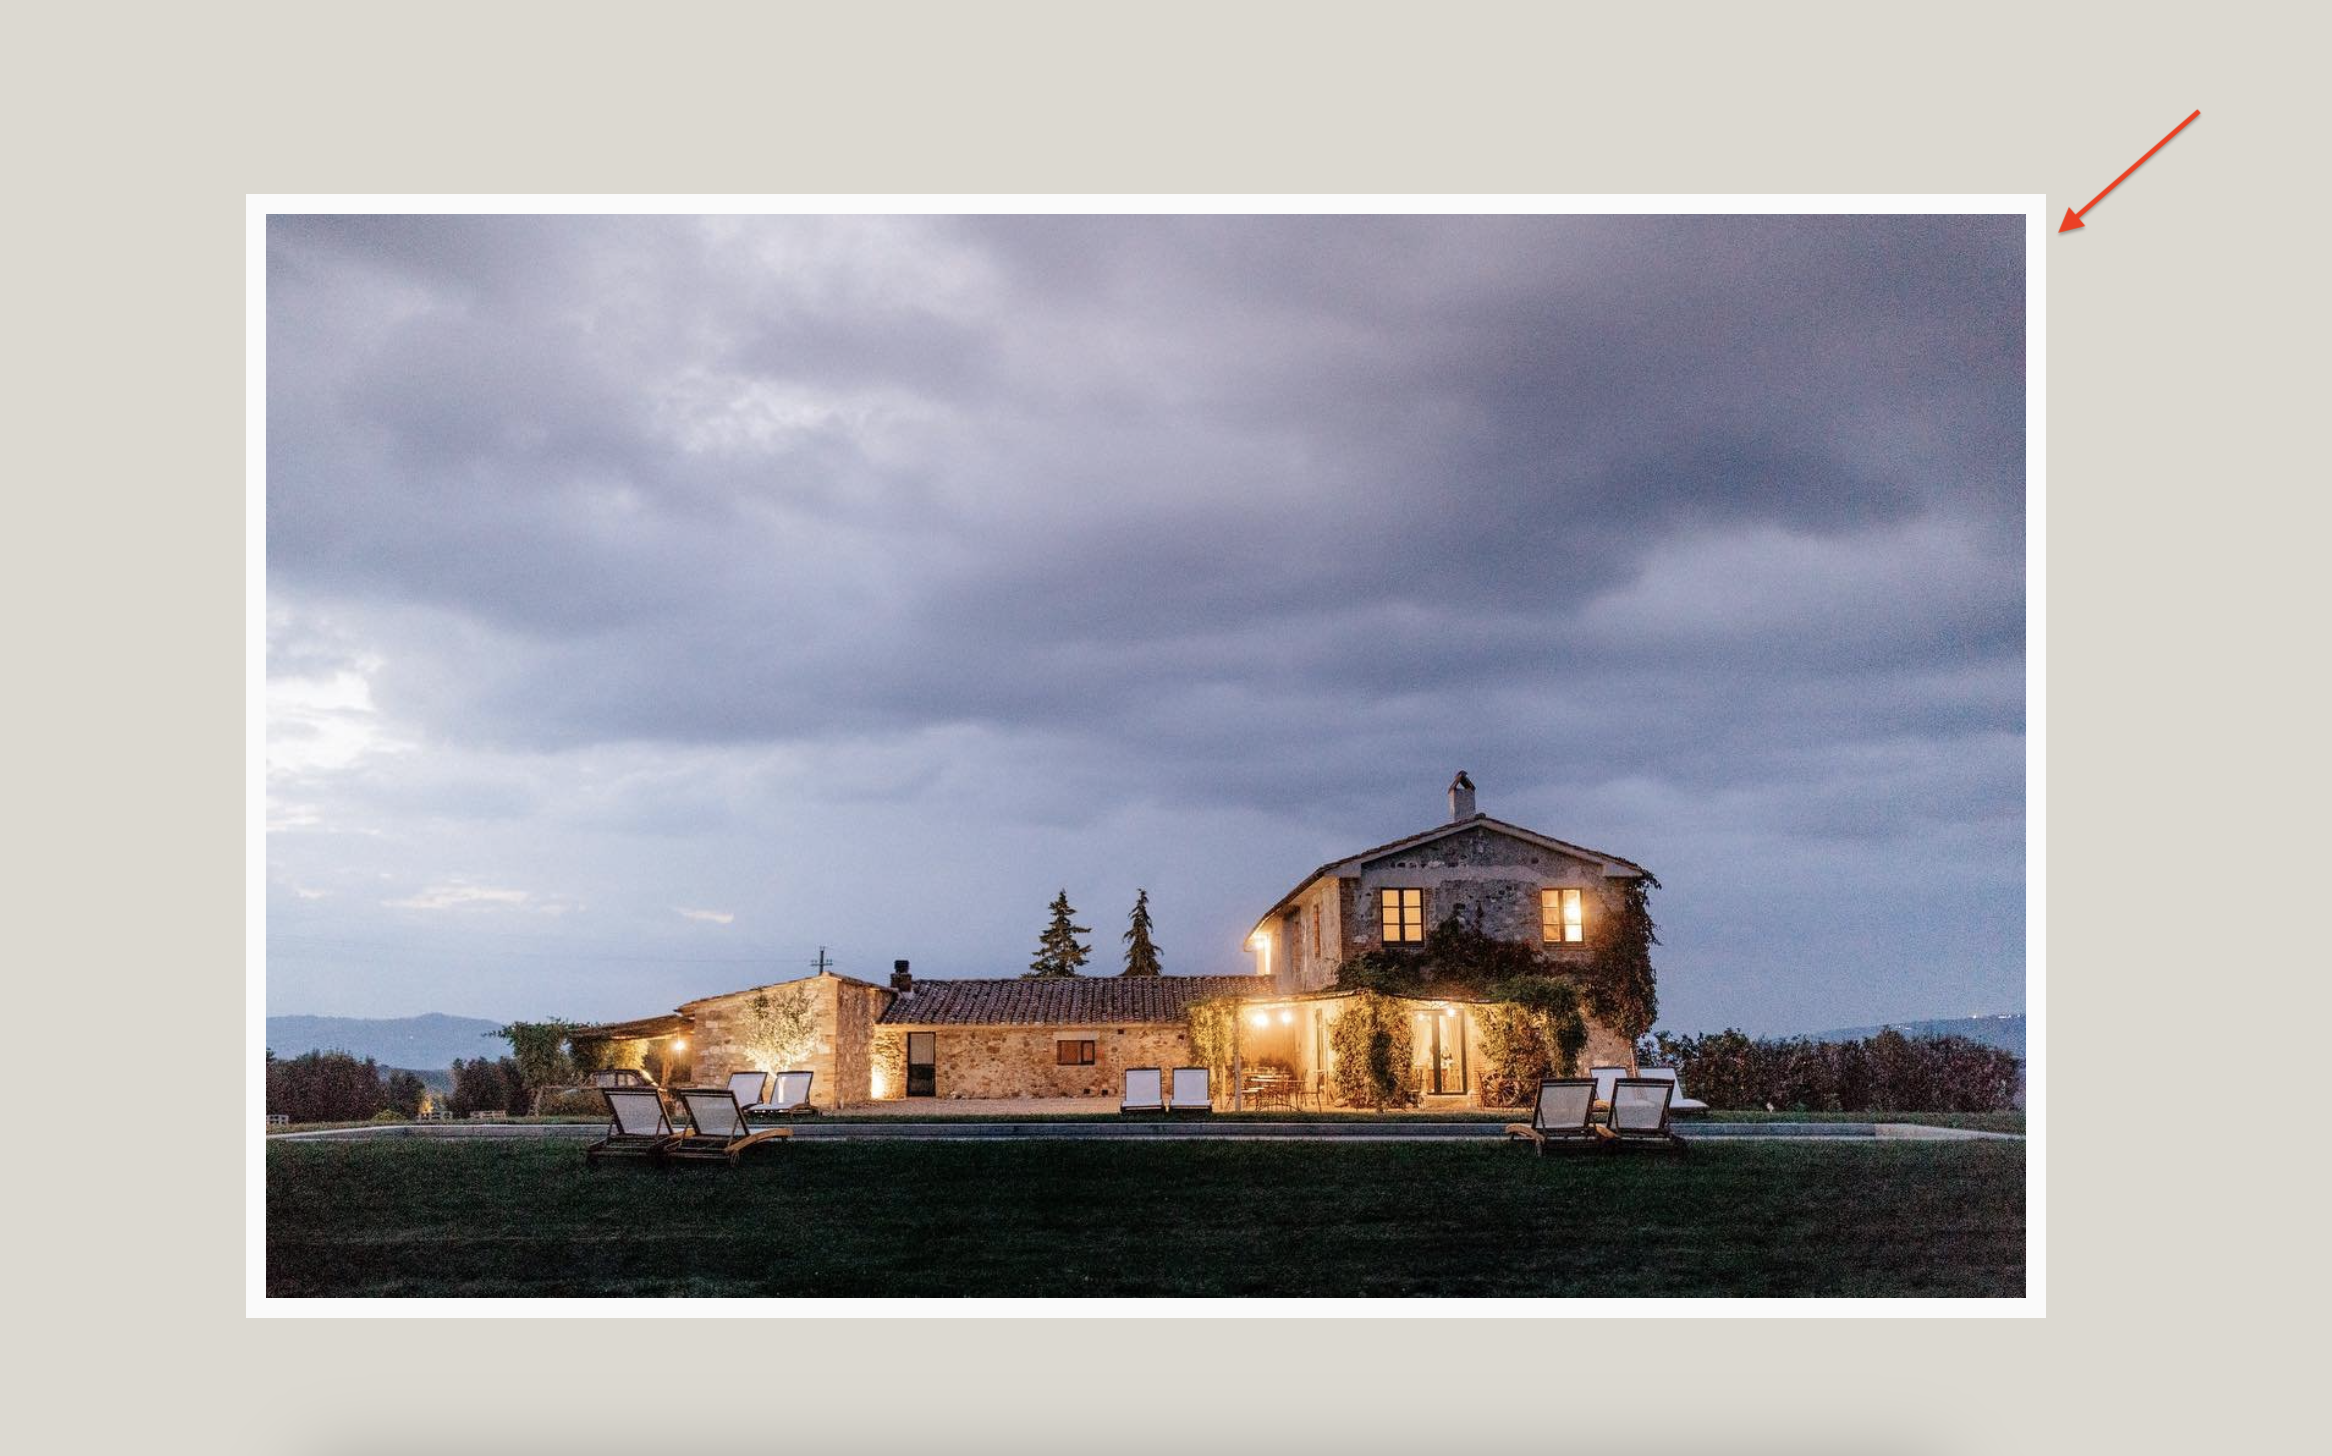
Before
After

Keep reading, there’s more ↓

How to Apply a Border to More Than One Image
Let's say you want to apply this border to more than one image.
Easy peasy! Here’s how you do it:
Locate the block ID of the additional image(s) you want to add the border to and select it using the Squarespace ID finder Chrome extenstion
Go back over to the code and after the last number of the first block ID add a comma and then paste the code you just copied

There’s one more important step…keep reading ↓
Be Sure ‘Fill’ is Selected in the Design Tab
You want to make sure that ‘Fill’ is selected in the design tab of your image block editor.
If ‘Fit’ is selected, you’ll notice some space between the image and the border because the border's going to go around the entire block and the image is just going to fit inside the block, it's not going to fill it.

IF you don’t select ‘Fill’
it could look like this…weird

Was this helpful?
Are you going to try this? Let me know how it goes in the comments 👇
If you liked this post, you’ll LOVE these:
This page contains affiliate links


Like this post?